

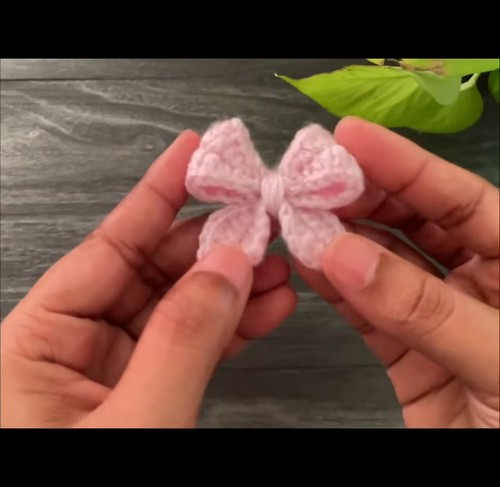
Turning a simple piece of yarn into a beautiful crochet bow, and then transforming that bow into a charming hair clip! This is a fun and creative way to add a bit of flair to your hairstyle or outfit. Crocheting a bow is simple and enjoyable, perfect for beginners looking to try something new.
Crochet Bow & Bow Hair Clip Pattern

Once you’ve made your crochet bow, attaching it to a hair clip allows you to wear your creation proudly. Whether you choose vibrant colors or soft pastels, your handmade bow hair clip is sure to catch eyes and bring smiles. It’s a delightful way to make your look truly your own.
Materials
Yarn: Any medium-weight yarn will do, such as worsted weight or DK weight.
- Crochet hook: The size of your hook will depend on the weight of your yarn. A size 3 or 4 hook is typically a good starting point.
- Tapestry needle: This will be used to weave in the ends of your yarn.
- Scissors
Optional: You can also use beads, buttons, or other embellishments to decorate your bow.
Making the First Part of the Bow

Foundation Chain:
- Chain 25.
First Row:

- Skip the first chain, single crochet in the second chain.
- Continue with half double crochets, double crochets, and treble crochets in the following chain spaces, doubling in each until the end of the chain.
- Chain 2 and turn.
Second Row:
- Start by working two half double crochets in the first two chain spaces followed by two double crochets, two treble crochets, and then decreasing back down with two double crochets, two half double crochets, and finally, two slip stitches.
- Repeat on the other side of the bow.
- In the last loop, work three single crochets, chain 1 and turn.
Remaining Rows:
- Continue with half double crochets, double crochets, and treble crochets, decreasing accordingly.
- Work slip stitches as described before.
- Repeat until the piece measures your desired bow length.
- Finish with a slip stitch, chain 1, cut the yarn, and leave a long tail.
Making the Second Part of the Bow

Foundation Chain:
- Chain 15.
Crochet Pattern:
- Repeat the process described in first part but start with a shorter chain (15 instead).
- Ensure you mirror the increase and decrease of stitches as in the first part, maintaining the bow’s symmetry.
Completion:
Continue the pattern until you reach the desired size and look, finishing similar to the first part.
Joining the Two Parts:
Assembly:
- Place the first part over the second, aligning them.
Securing:
- Using the long tail and needle, stitch through both loops along the edges of the two parts to join them securely.
- Ensure to make several passes to hold the parts firmly together.
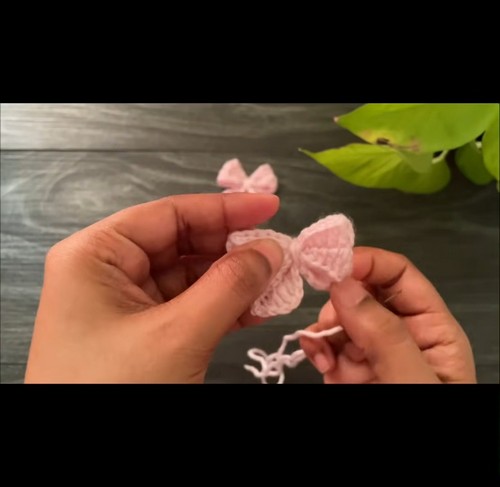
Final Touches:
- Wrap the yarn neatly around the middle of the bow to define its shape.
- Secure the wrap behind the bow with a knot and trim any excess yarn.
This crochet bow can be attached to a hair clip or used as a decorative piece on gifts or clothing. Enjoy your charming handmade creation!
Leave a Reply