


With clear directions for creating the mesh design, shaping the trumpet sleeves, and assembling the pieces together. This versatile crop top pairs wonderfully with high-waisted jeans, skirts, or over a simple dress, making it a must-have addition to your wardrobe.
Tip:
Regularly measure the top against your body as you crochet to ensure it’s tailored perfectly to your measurements.

How to Crochet a Mesh Top
Materials Needed
- 4-ply yarn
- 5 mm crochet hook
- Stitch markers (optional)
- Pair of scissors
- Yarn needle
Instructions
Step 1: Create the Foundation Chain
- Start with a slip knot.
- Make a foundation chain that is a multiple of four. For this tutorial, the chain will be 52 stitches long, but you can adjust the length according to your measurements.

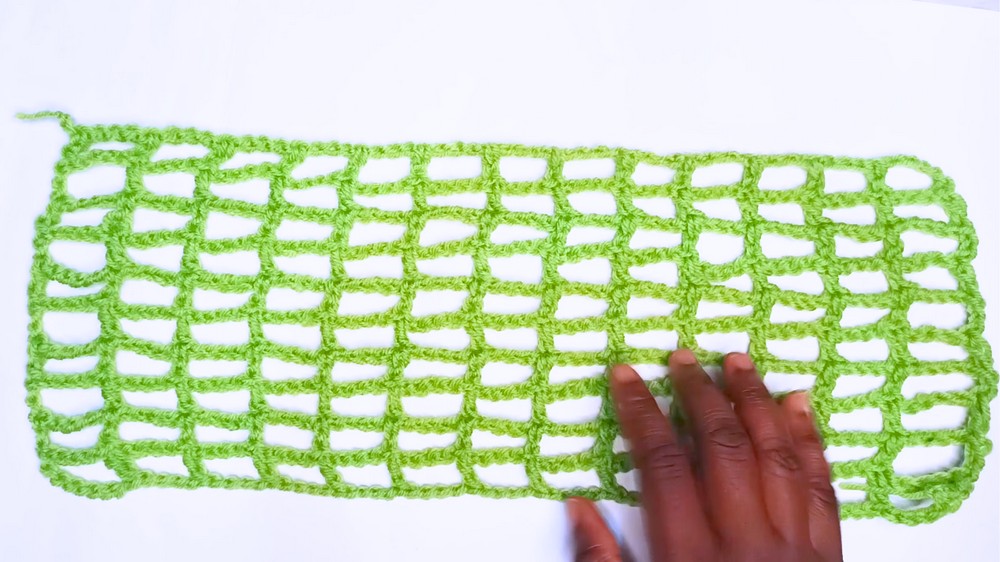
Step 2: Begin the Mesh Pattern
- Chain 5 more stitches.
- Count from your starting point and make a double crochet into the 4th stitch from your hook.
- Continue the pattern by chaining 4 stitches, then skipping 3 stitches and making a double crochet into the 4th stitch.
- Repeat this pattern of chaining 4 and making double crochets into the 4th stitch until you reach the end of the row.
Step 3: Start the Second Row
- When you finish the first row, turn your work.
- Chain 3 (this will act as the first double crochet of the row).
- Chain an additional 4 stitches for the mesh pattern (totaling 7 chains).
- Yarn over and make a double crochet on top of the previous row’s double crochet.
- Continue by chaining 4 and making double crochets on top of the previous row’s double crochets.
- Repeat this pattern across the row.
Step 4: Continue the Mesh Pattern
- Turn your work at the end of each row.
- Chain 3 for the first double crochet, then chain 4 more for the mesh pattern.
- Double crochet on top of the previous row’s double crochets.
- Repeat the mesh pattern until you have the desired length to cover your chest. Around 10 rows should be sufficient, but you can adjust as needed.
Step 5: Create the Back Panel
- Repeat Steps 1 to 4 to create an identical panel for the back of the top.
Step 6: Join the Front and Back Panels
- Align the front and back panels together, making sure they are of equal length.
- Use slip stitches or single crochet stitches to join the sides, leaving openings for the sleeves.
- You can also place stitch markers to ensure even joining.
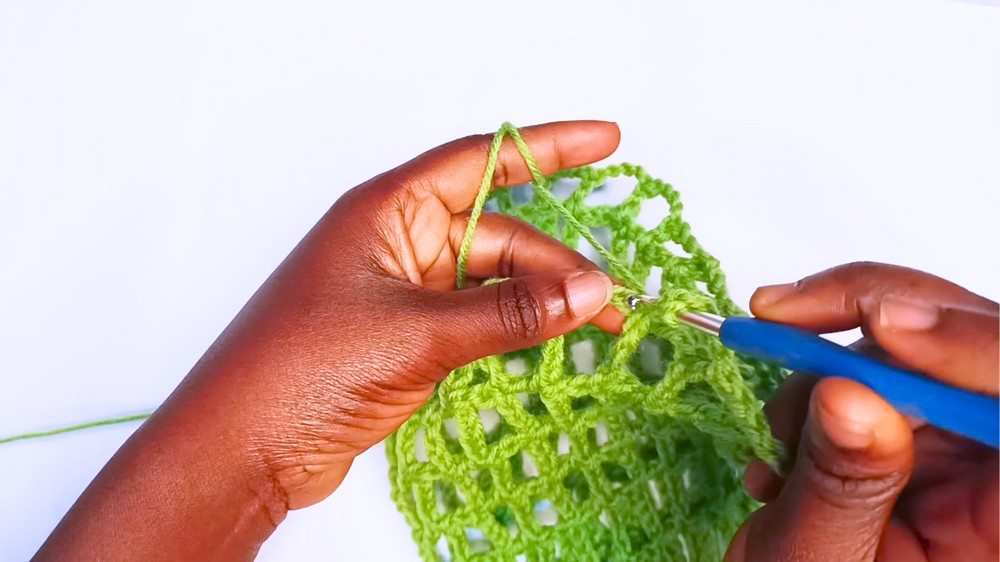
Step 7: Crochet the Sleeves
- Start at the side seams where you want the sleeves to begin.
- Chain 4 and join to the top of the double crochet on the side.
- Continue with the pattern of chaining 4 and making double crochets on top of the corresponding stitches, moving around the armhole.
- The sleeves will begin to take shape as you add more rows.
- Adjust the number of rows to your desired sleeve length. If needed, reduce the number of chains for a tighter mesh or increase them for a looser fit.
Step 8: Finishing Touches
- Once the mesh top and sleeves are complete, make sure all loose ends are woven in using a yarn needle.
- Cut off any excess yarn.
Conclusion
You have just completed a stylish crochet mesh top. This versatile piece can be made in various colors to complement your wardrobe. It can be worn over a plain dress or paired with different outfits for a chic look.


Leave a Reply