

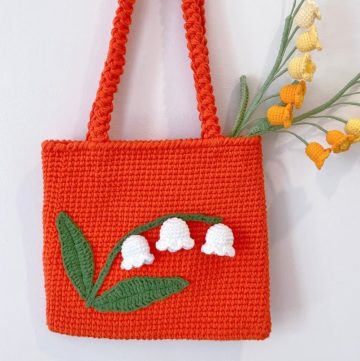
Start making a Crochet Rainbow Bag and add a pop of color to your day! This cheerful design lets you combine bright strands, much like using a paintbrush, but with yarn. It’s perfect for anyone, whether just starting or with plenty of experience, providing a playful opportunity to hone your craft.
Crochet Rainbow Bag Pattern

Let yourself picking up this vivid tote on your way out; it’s more than just a bag, it’s a creation that brings joy. Carrying a piece of the rainbow with you, you’ll brighten up not only your outfit but also the mood of those around you.
Materials List
- Yarn: Variegated shades of green, blue, pink, orange, and white; worsted weight recommended.
- Hair Tinsel: Colors in blue, green, and silver, available at beauty supply stores or online.
- Crochet Hook: 4.0 mm for best results.
- Zipper: 8-inch length, or preferred size.
- Strap: 24-inch leather strap, or preferred material.
- Tassel: Small, available at craft stores or online.
- Needle and Thread: For sewing the bag parts together.
- Scissors: For cutting yarn and hair tinsel.
Making

Crocheting the Bottom
- Start: Chain 34 double crochets.
- Row 1: Double crochet in the second chain from the hook and in each chain across.
- Rows 2-9: Continue with double crochet in each stitch across. Finish, cut the yarn, and weave in the ends.
Crafting the Sides

Foundation Chain: Chain 4.
Row 1: Double crochet in the second chain from the hook and in each chain across; Chain 2.
Pattern Repeat:
- Skip 2 stitches.
- Work 28 double crochets.
- Chain 2, skip the next 2 stitches, and double crochet in the next 28 stitches.
- Continue for rows 2-16. Finish, cut the yarn, and weave in the ends.
Attaching the Sides to the Bottom
- Sewing: With the right sides facing each other, stitch the sides to the bottom, leave an opening for the zipper.
Adding the Zipper
Installation: Fit the zipper in the opening and sew securely.

Forming the Front and Back
Foundation: Chain 34 double crochets.
Row 1: Double crochet in the second chain from the hook and in each chain across.
Row 2: Double crochet in the first stitch, chain 2,
- Skip the next 2 stitches, double crochet in the next 28 stitches, chain 2,
- Skip the next 2 stitches, double crochet in the remaining stitches.
- Repeat this pattern through rows 2-16. Finish, cut the yarn and weave in the ends.
Attaching the Front and Back to the Sides

Sewing: With right sides together, sew the front and back panels to the sides, reserve a small section for the strap attachment.
Final Touches
- Strap Attachment: Place the strap in the reserved opening and sew to secure it.
- Adding a Tassel: Fasten the tassel to the zipper for decoration.
- ‘Mumu’ Lettering: Using embroidery or crochet, add the ‘Mumu’ lettering to the front panel.

Final Step
- Revel in the accomplishment of creating your custom ‘Mumu’ bag, a perfect blend of functional art and style.

Leave a Reply