

Christmas time brings with it a sense of joy and warmth, filling our homes with laughter and cheer. One of the most cherished traditions is hanging stockings, each one holding the promise of small gifts and surprises. It’s a symbol of the festive season that adds a special charm to our decor. Now, imagine adding a personal touch to this tradition by creating your very own Crochet Christmas Stocking Ornament. This free crochet pattern is designed for those who love to infuse their holidays with handmade delights, turning simple moments into cherished memories.
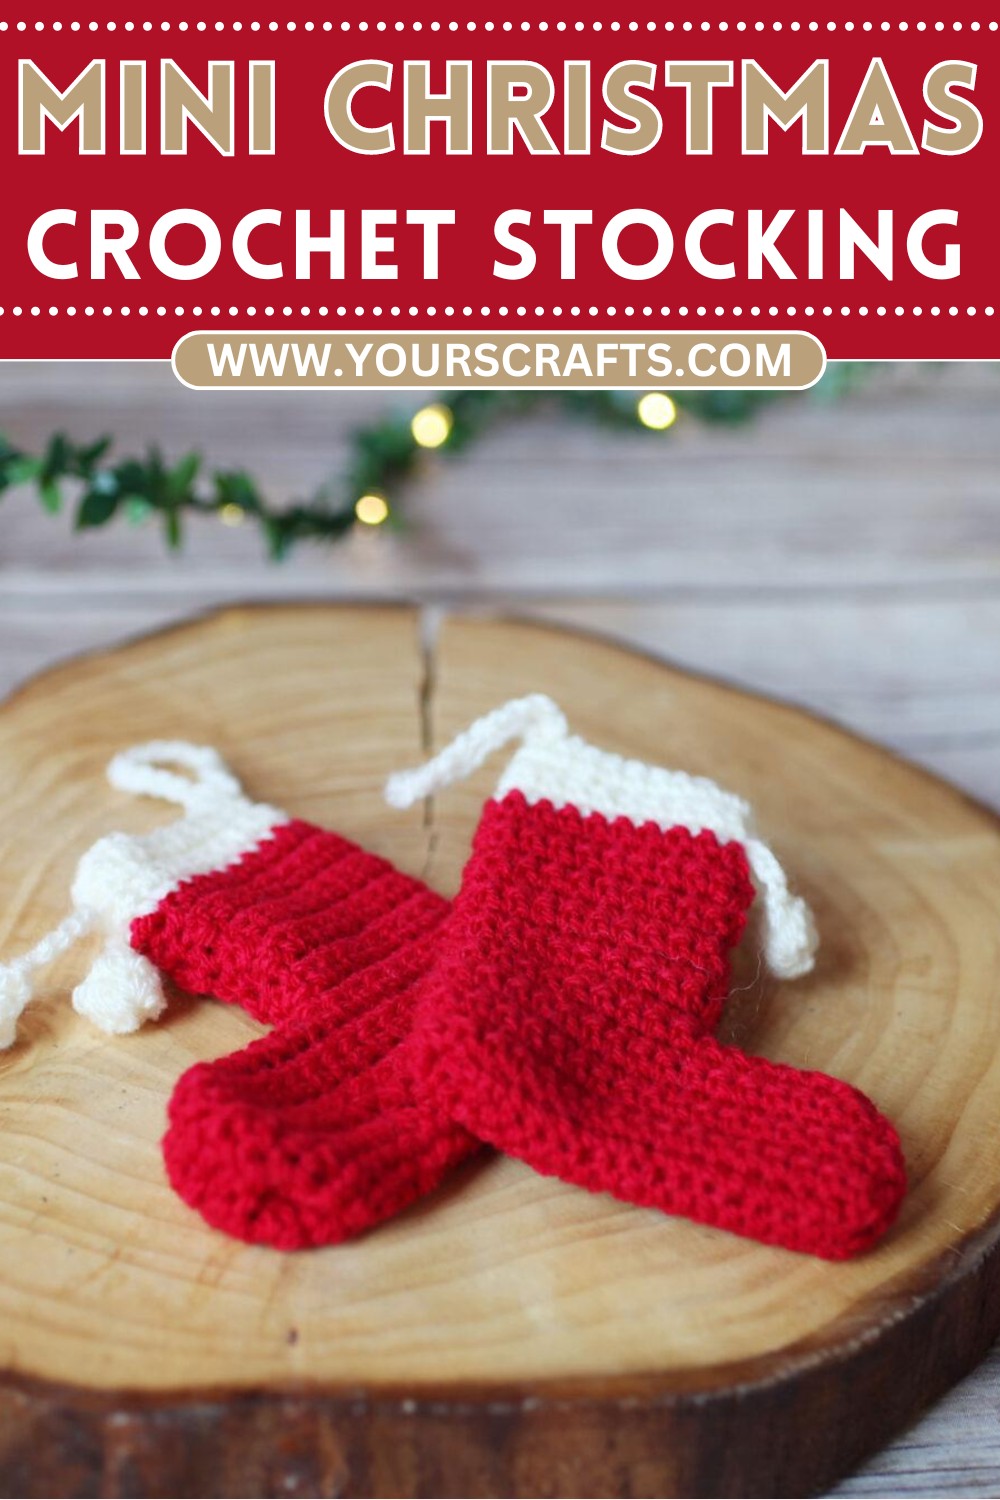
Mini Christmas Stocking
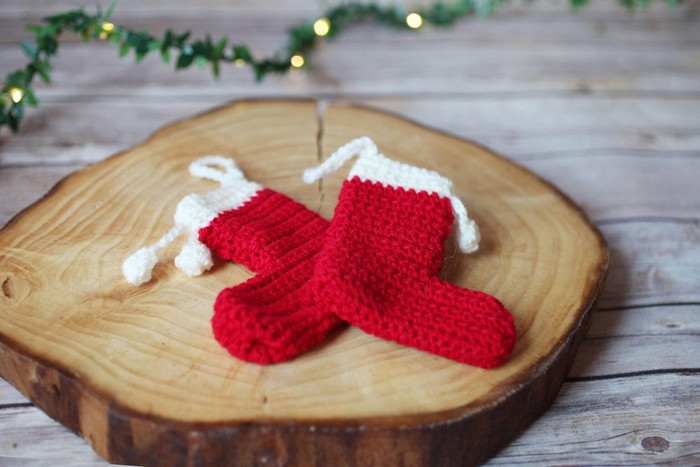
Deck the halls with your very own handmade mini Christmas stocking ornaments. These adorable little wonders are perfect to sprinkle holiday cheer throughout your home. Whether you decide to hang them on your Christmas tree as decorations, string them together to make a festive garland or fill them with tiny surprises as special gifts, they’ll add a unique, homemade touch to your celebrations. What’s more, you can even craft a set of 25 and turn them into a charming advent calendar. With just a splash of your favourite yarn colours, these stockings can be customized to fit any holiday decor.
Making The Mini Christmas Stocking
Materials and tools
- Yarn: The creator has used Style Craft Special DK in colours: lipstick red and cream
- Hook: 4mm
- Scissors
- Darning Needle
Abbreviations:
- ch: Chain
- dc: Double Crochet
- dc2tog: Double Crochet Two Together (a decrease stitch)
- sts: Stitches
- cs: Cluster Stitch (though not a standard abbreviation, this seems to be used in the context of the pattern)
- ss: Slip Stitch
Step by step Pattern
- Using colour A, chain 38.
- Round 1: Dc in 4th ch from hook, dc across. (36 stitches)
- Round 2-6: Ch2, turn work, dc across. (36 stitches)
- Round 7: Ch2, turn work, dc2tog, dc in next 30 sts, dc2tog, dc in last st. (34 stitches)
- Round 8: Ch2, turn work, dc2tog, dc in next 28 sts, dc2tog, dc in last st. (32 stitches)
- Tie off yarn, turn work and attach yarn in the 7th st from the end of the previous row.
- Round 9: Ch2, dc across remaining 19 sts. (20 stitches)
- Round 10-18: Ch2, turn work, dc in next 19 spaces (20 stitches)
- Tie off the yarn, and attach colour B.

- Round 19-22: Ch2, turn work, dc across (20 stitches)
- Fold work right sides facing, dc around the edge working through both thicknesses (Working over colour A only).
- Tie off yarn and continue dc around work using colour B.
- Finishing:
- Sew in ends and turn right side out.
- Pom pom:
- Attach yarn towards the front of the stocking.
- *Ch6, cs in 3rd ch from hook. Ch3, cs in the top of the last cluster, fold to stitches onto each other and ss together.
- Repeat from * once more.
The finished stockings can be made using different colour combinations according to your personal preference.
Remember to sew in all loose ends to finish your project neatly and to turn the stocking right side out to have the correct side facing externally.

Leave a Reply